How to Do a Spec Shoot
and Why You Might Want To
Probably for years now, I’ve been saying I want to take my photography more seriously. The only problem is, I was as unclear about what I meant by that as you probably are.
I have no problem calling myself a professional photographer. No, it’s not my primary source of income. But I get hired for my photography, I’ve sold prints, I’ve taught others. Yet I’ve been feeling like my photography has lacked direction in a way I want it to. First and foremost, I aspire and work towards being a fiction writer; but that doesn’t mean I want to set photography aside. I have ambitions for my photographic work that go beyond keeping it as a simple hobby—though were I never to make another dime on my photos, I’d still keep taking them.
For me, I see my photography in two main categories: personal and professional. Both have gotten a little murky for me lately. The personal side is mostly the street / candid photography I’ve been taking for about a decade now. It’s clearer to define for me, but I still want to take it a step further, get my work seen, so I’m working on doing my first true personal photo project, as well as curating and submitting photos for contests, etc. (I’ll probably write more on this later!) On the professional side, most of the paid work I’ve done has been headshot or portrait photography, but I don’t really aspire to become a headshot or even a portrait photographer. I wanted to find a way to make some work that I was proud of, that contained a bit of my artistic sensibilities, while gesturing more towards something a bit more commercially-minded. So I made a spec shoot.
A spec shoot is a photoshoot, usually unpaid, designed to learn something, explore an idea, or showcase either a new talent, technique, or style of work for potential clients. It’s hardly a unique angle, but I’ve always really liked working with a subject to make portraits, and wanted to explore making some fashion-adjacent portraits with a model in a way that felt in line with my candid, street photographer sensibilities. I wanted to write this up both as a mini how-to guide if you wanted to organize your own spec shoot, as well as a condensation of some of the ideas and things I learned during this process.
Organizing the Shoot:
Building a Moodboard
First, I needed a plan. I’m constantly saving photos from photographers I like or things that come up on social media, but usually these get sent into an “inspo” folder, which I just browse through randomly when I’m looking for a spark for any sort of creative work. So I went through this folder, and separated out first the photography, then the model photography, and finally split those into studio / location photography.
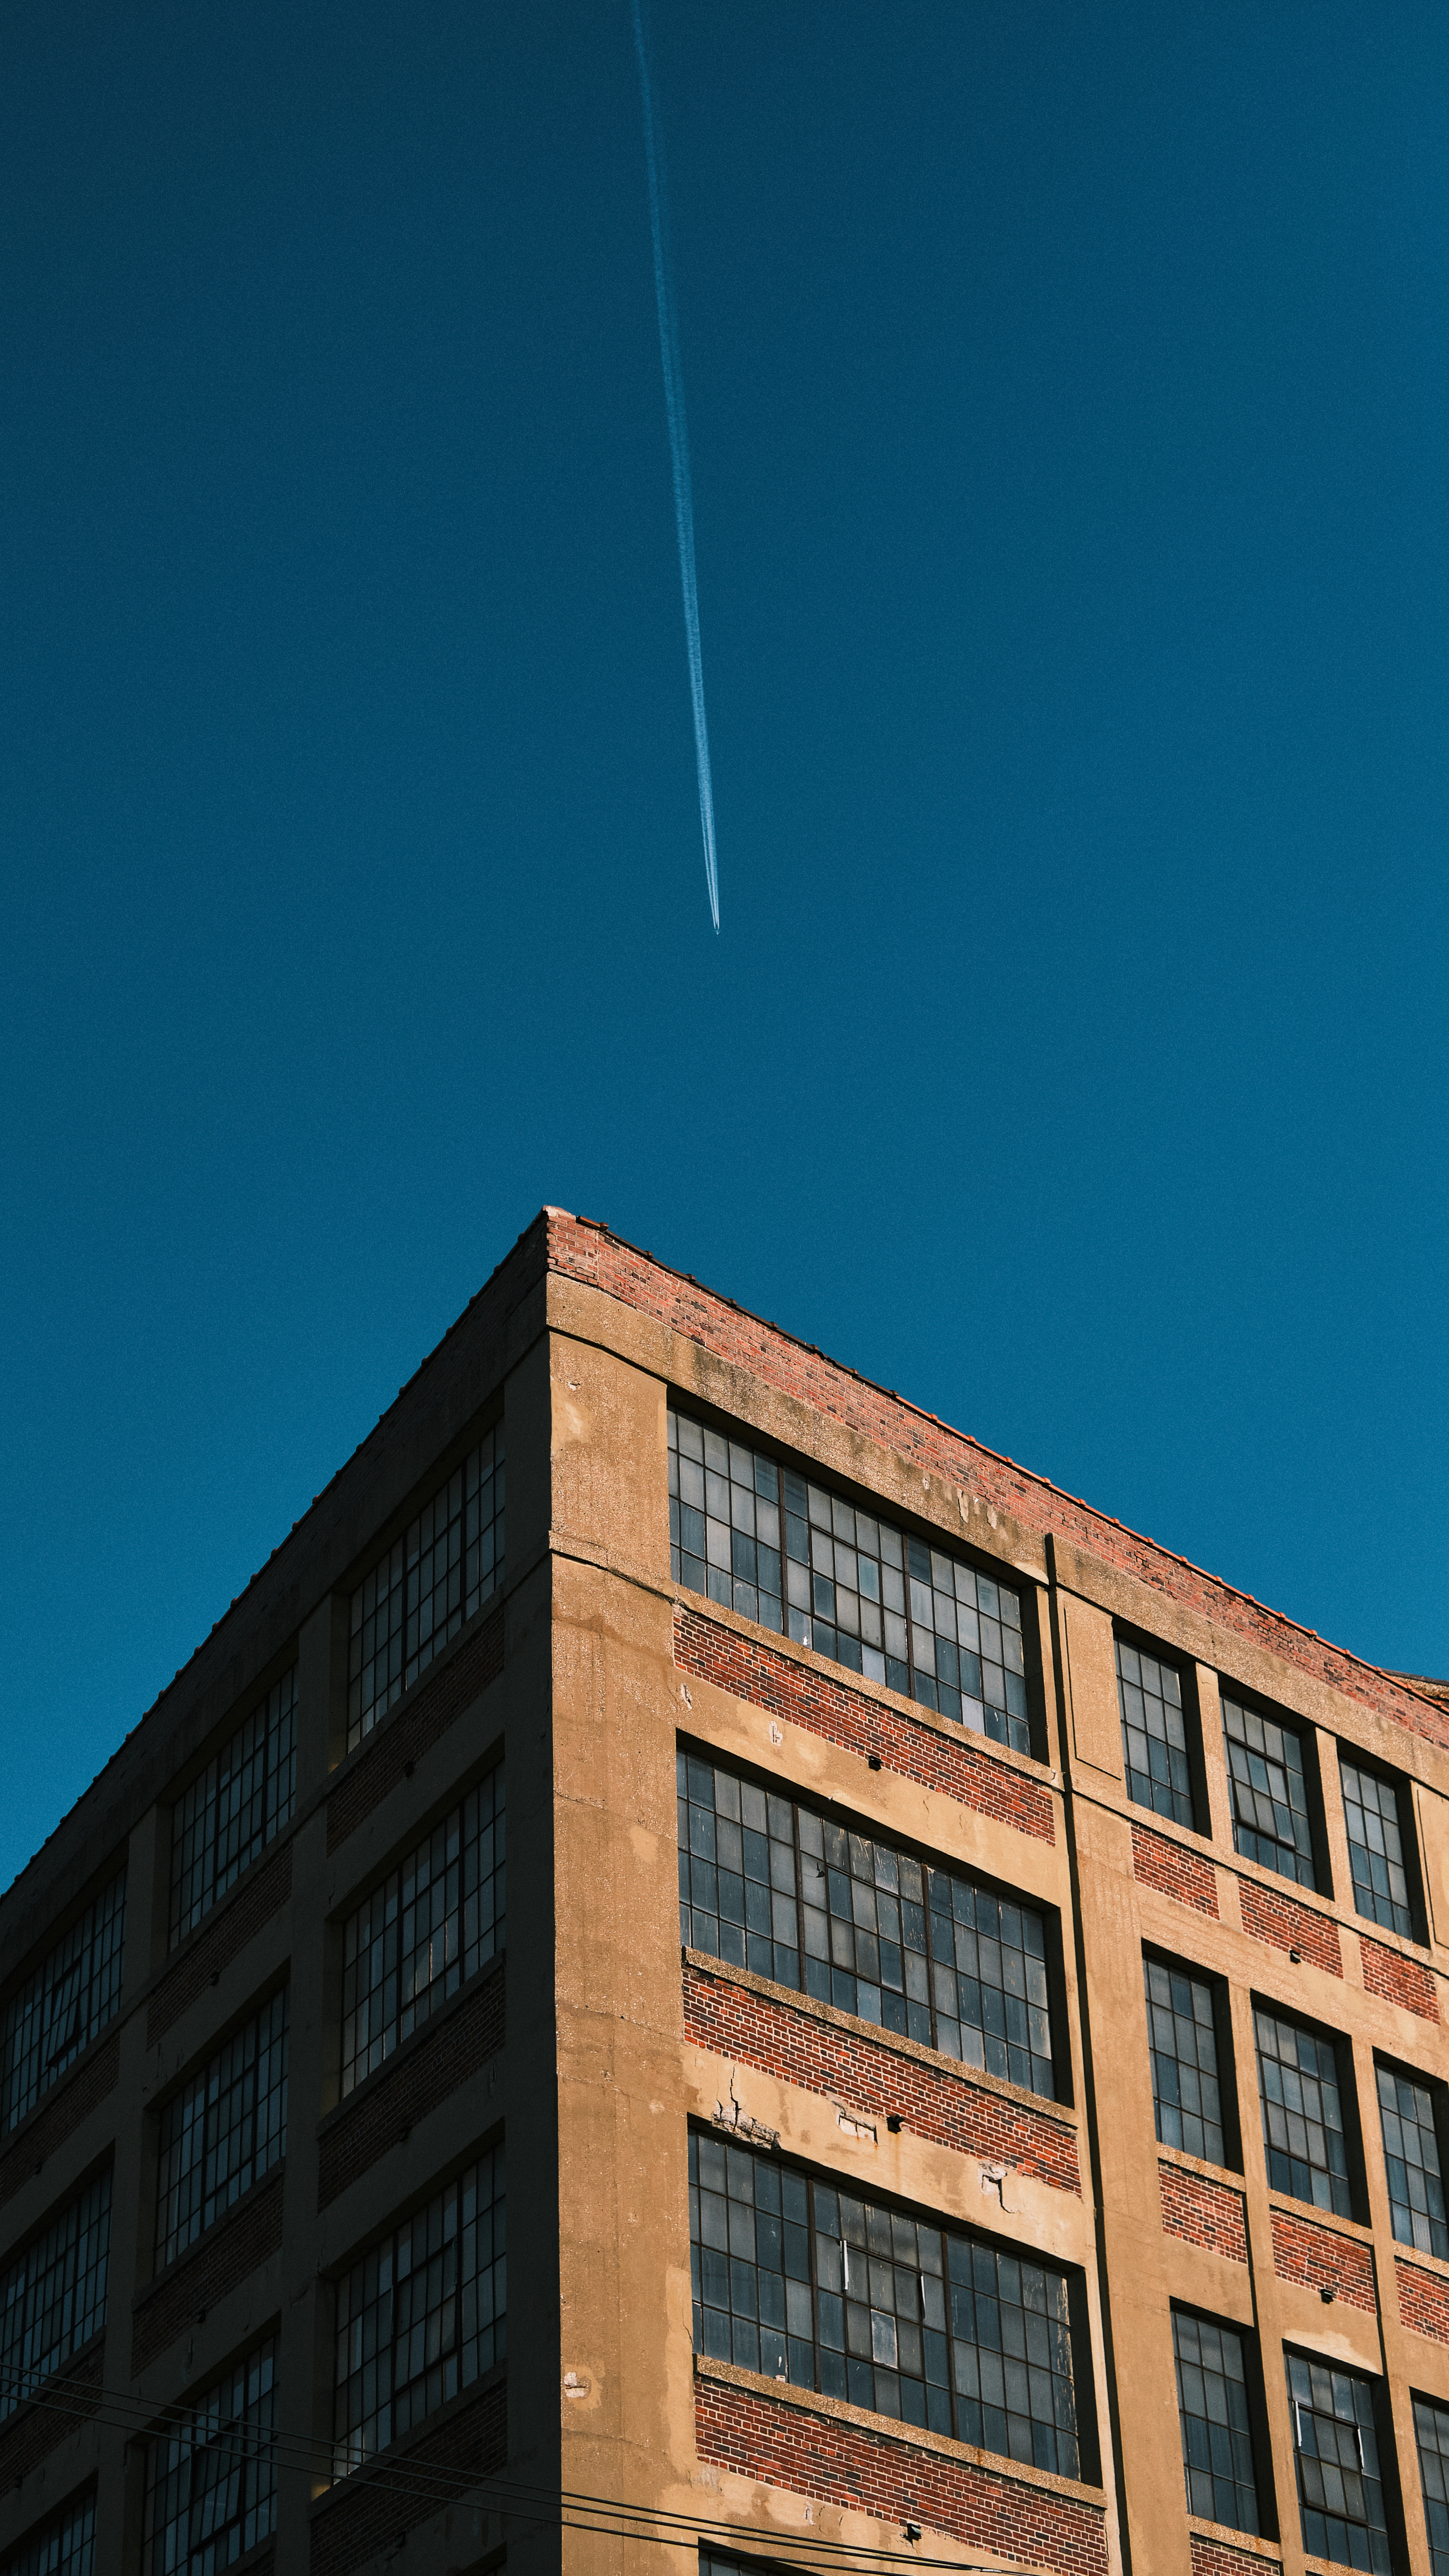
For this shoot, I knew I wanted to do something on location, to get that candid / city aesthetic I was going for. I compiled this into a moodboard, not only for my own reference, but to be able to share with the model and anyone who would help me down the road.
Finding a Model
Next, I needed a model. I started looking through modeling websites, like model mayhem, backstage, etc. I had previously used sites like this to post casting calls for short films I worked on in while in film school, so it was only a matter of shifting the parameters to find models who might fit the bill.
I reached out to a few via the messaging functions on the site, but did not have much success. Instead, I tried Instagram: both for models I’d already found, and expanding my search a bit. In the end, I messaged two actors / models on Instagram I thought would do well, and got a response from one, who’s the model I eventually ended up photographing.
I tried to be very direct in my message, clarifying this was a spec shoot, but showing some of my previous work, and also explaining what they’d get out of the project (namely, finished photographs). It was a bit nerve-wracking to ask someone to more or less work for free, but I was putting money into the project, and I was clear about this at all stages; so it was just up to them if they wanted to participate or not.
Planning the Shoot
From here, I had to get all the logistics down. Where would we shoot? When would we meet? How long would it take? What would be provided on set? What was the goal for the day?
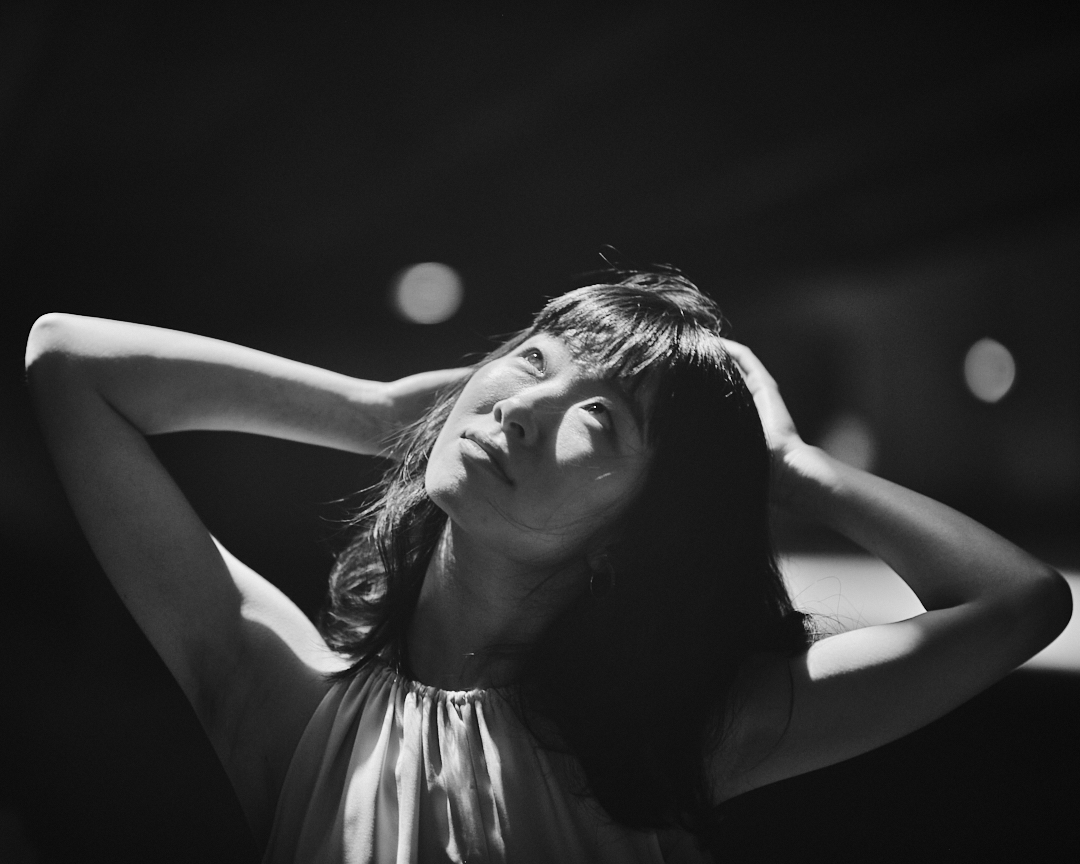
I thought a lot about these questions in regards to the vision I had in my head based on the images I’d curated, and also the project as it was beginning to shape into, which helped me refine my answers. In my case, I knew I wanted to shoot on location, and do so in a way where I’d get some hard light, which suggested around noon to me. I collected all the information, including the moodboard, and put together a small page on my website for the callsheet, including a Google Maps link to the location, a schedule, a list of the crew (just an assistant and myself) and sent this off to everyone involved. The model was surprisingly impressed by this; I think it’s the sort of gesture that goes a long way in making yourself seem professional, even if it’s just a spec.
The Shoot
Now it was time for the actual shoot. I planned my gear carefully to keep things light, while still providing me everything I needed to accomplish what I’d set out to. In my case, that meant one camera body, two lenses, a film camera, a strobe, an umbrella, and a stand, and that was it. I had someone to assist me, but wanted to be able to carry my camera and all my gear myself.
I brought two lenses, but stuck to one for the majority if not the entirety of the shoot. I also wish I had brought a pop-up reflector, and a colorchecker card. Reflectors are annoying to fit into most bags, but the ability to add a bit of fill when you don’t want to add strobe is extremely handy, as well as the ability to easily and accurately match colors when lighting conditions change. Going forward, I think I’d just keep a colorchecker as one of the things that never leaves my bag.
In this case, I’d worked with the model to plan her own makeup, hair, and wardrobe, rather than hire someone for those roles. I hope to do a studio shoot soon, jumping off of this one, and intend to have at least a hair and makeup artist there, but for this shoot, I wanted to be able to move around easily and keep things minimal. Knowing what you want to accomplish and what you need to do so is a huge part of planning any spec shoot, I think.
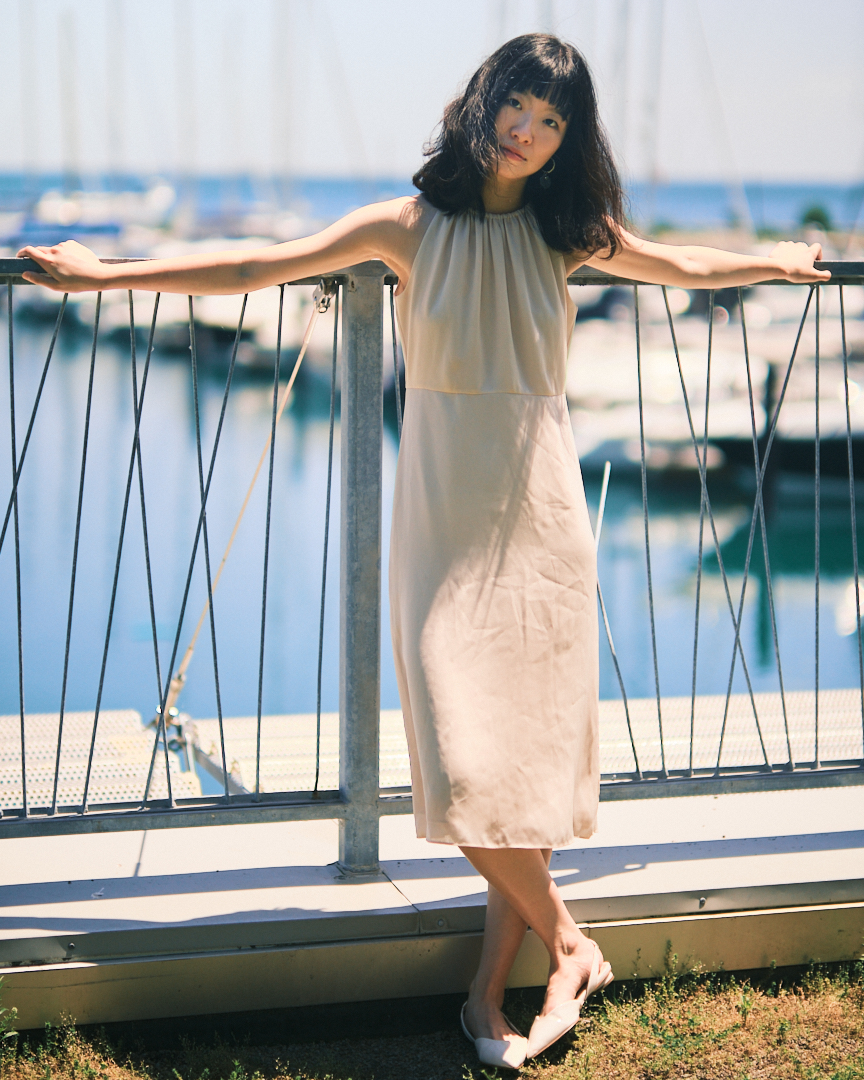
The shoot itself went well. We moved pretty fast; I’d picked a park, but knew I wanted to hit a couple of locations there to get a range of different looks. That’s something I keep reminding myself while making any photographs: slow down! In street photography, sometimes time is of the essence, and while I think that has benefited me and my photography work in general, it’s good to remember to slow down and be clear about what you’re capturing. I’m extremely happy with the shots I got, but I think there are a handful of things I could’ve done better if I’d slowed down even further.
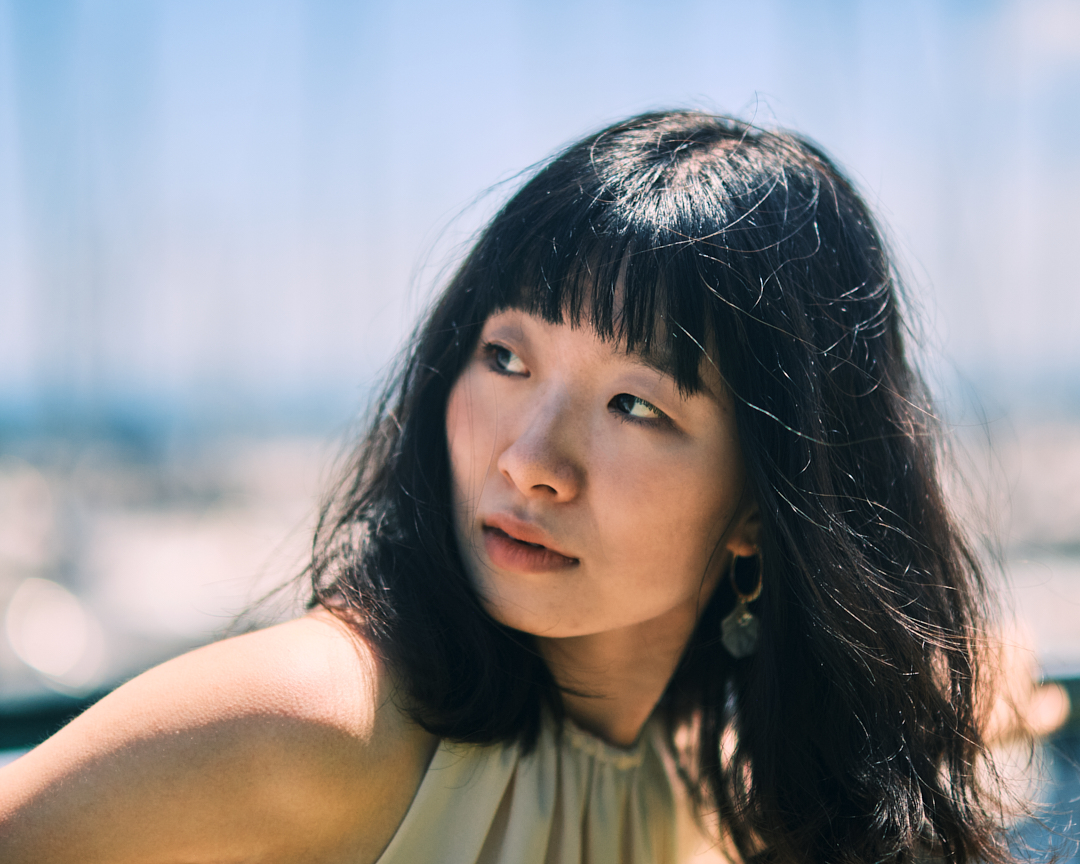
For this, I wanted things to be sort of fast and free, and had pulled a lot of reference images that were a bit “looser” in style than most fashion shoots. But it’s still good to keep in mind a handful of things while you’re shooting. Are there loose or flyaway hairs? Any weird wrinkles or folds in fabric? Having a friend there as a photo assistant was hugely helpful for a number of reasons, but especially as a second set of eyes to make sure everything was in its right place.
Post-Production
Image Curation and Sequencing
Now, time for post-production. I mostly shot digital, though I also took a handful of film photos as well. Film processing is its own beast, so I’m going to focus on the digital aspect here. I went through my process as normal for the most part, first curating down images into my selects. Out of just over 200 images shot, I got down to about 15 I felt strongest about, which I further revised into two groups of six, with help from a friend.
This is something I want to work on with my personal photography, as well: image sequencing. I don’t think I’ve got social media brain, but I do think it’s easy to just make images you think are “nice,” and leave it at that. I wanted to find images that had a harmony together, worked well as a set. It’s sort of like composition, but on a larger scale. To me, thinking about making “sets” of photos in this case makes it feel more complete than if my attention was only tuned to a single frame at a time; it helped clarify the project even further.
Advanced Processing
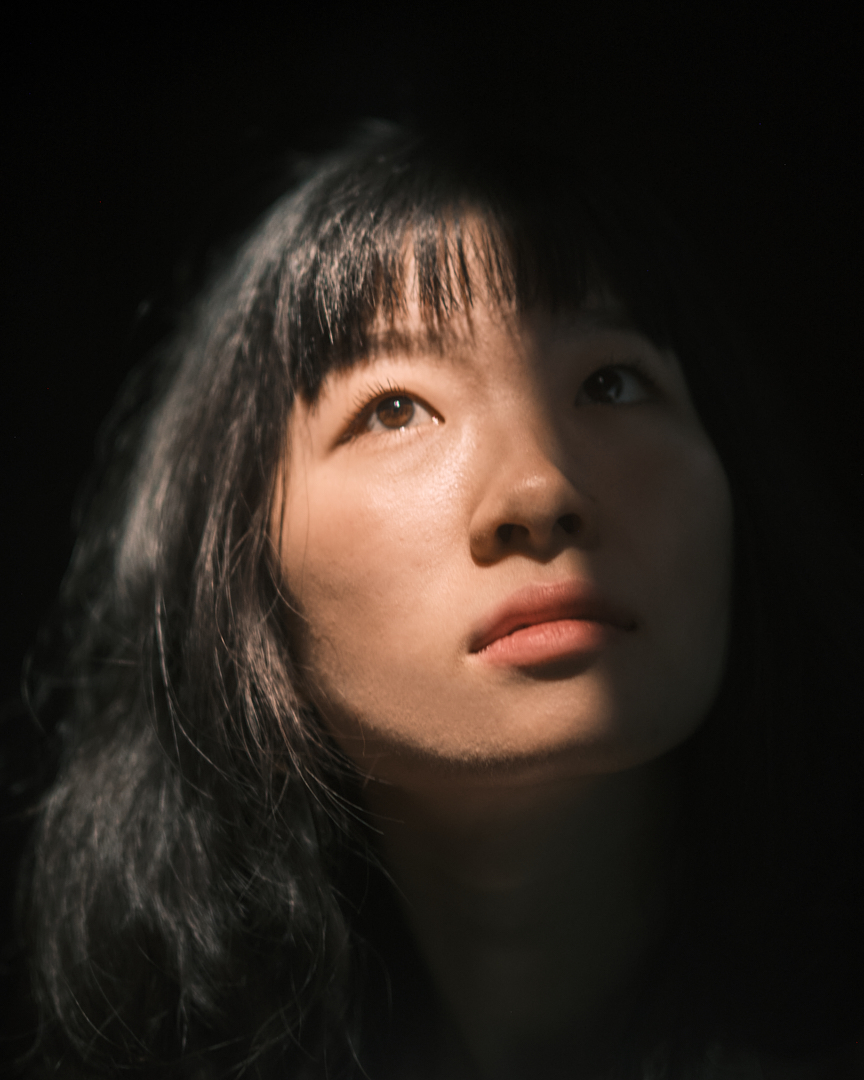
This ain’t your dad’s photo processing… About a year ago, I met up with an acquaintance of mine who is a full-time photography, who suggested I refine my editing and processing to take my work to the next level—so working on that was a big part of my goal of this project. I got the photos as close as I could in Capture One, with special attention paid to the skin tones in particular. I think I learned more about how the skin tone controls work in Capture One this time around, in particular increasing the similarity of hue and saturation across the entire frame. This is where something like a colorchecker would’ve especially come in handy, but it’s good to know there are ways to manage it even without.
I exported PSD files from Capture One, and brought them into Photoshop for some final processing. For this, the tutorials from PixImperfect on YouTube were huge. Especially this tutorial on getting accurate skin tones, and several on frequency separation.
I met up with a friend of mine who does work as a photo retoucher to get her opinion on the photos, and she pointed out there was a bit of inconsistency in the skin tones between the highlights and the shadows. Sort of to be expected with such hard light, but it was good to get it corrected, which is where those tutorials came in handy.
She also suggested frequency separation, which is one of those techniques I sort of knew about, but hadn’t implemented. Basically, it’s a process for separating an image into two layers, high frequency and low frequency, which practically means that one layer contains only the details, and another contains only the color. Separating detail and color like this is hugely valuable, not only for smoothing out skin tone, but also making corrections that would be nearly impossible otherwise. Beyond everything, it also just shifted the way I thought about the images a bit, gave me what felt like a more painterly approach. I’ve been reading a bit more about one of my favorite painters, John Singer Sargent, and his confidence in rendering images primarily via tone and value rather than detail felt apt here—but I digress.
I’m including the frequency separation action for Photoshop I used below, free for subscribers. (Thanks Rachel!)
Conclusion
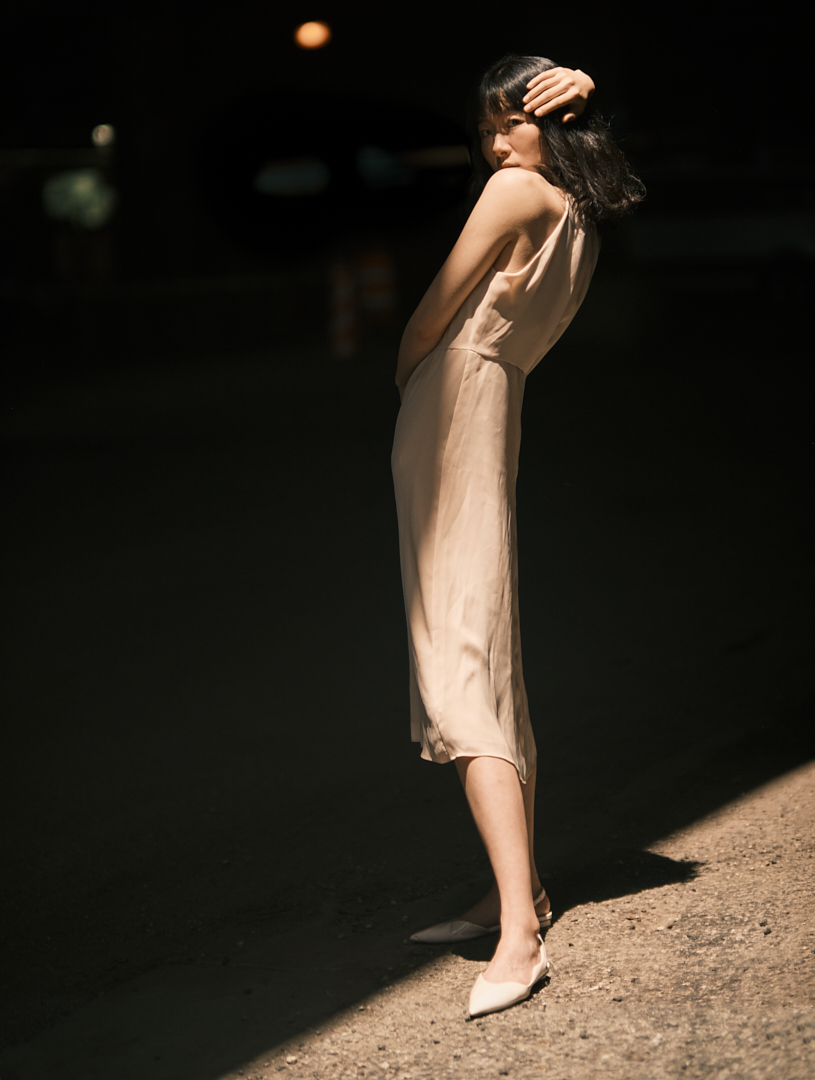
After that, I simply put together a gallery of the finished images, and sent them off to the model. I’m thrilled with how they turned out, and also learned a ton doing this shoot—a success all around.
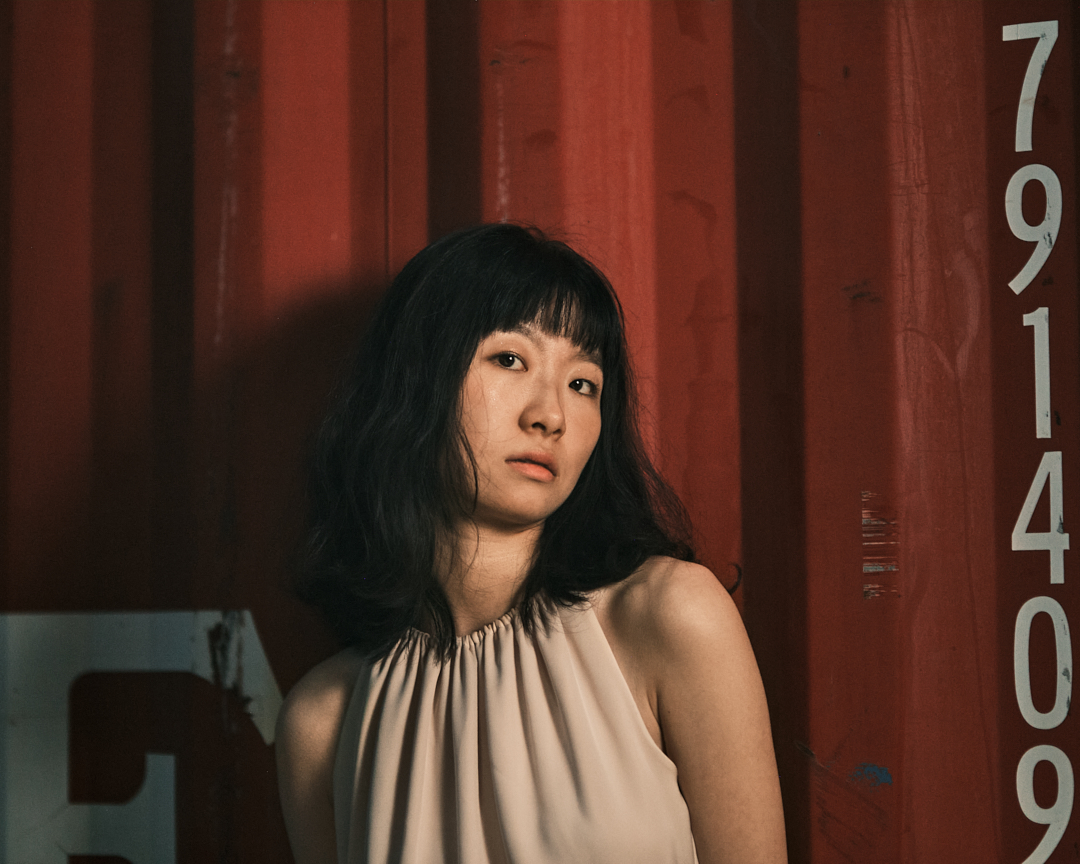
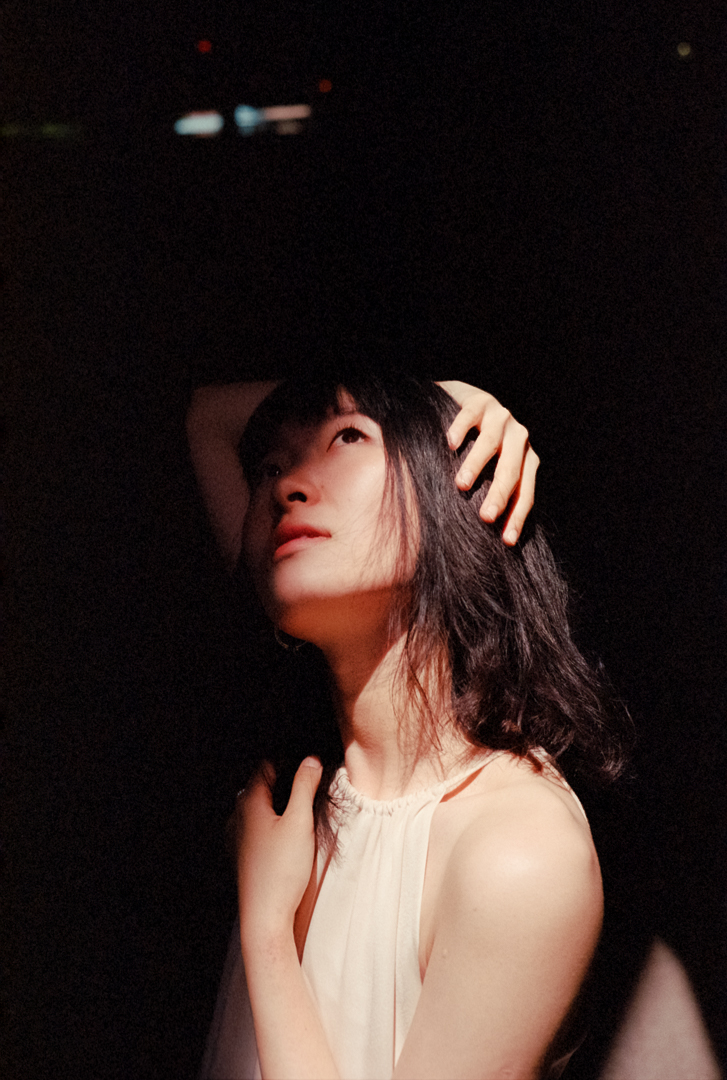
Here’s a gallery of some of the selects, shot on either my Fujifilm X-Pro3 with the 50mm f/1 (almost all at or near f/1, too), or Portra 400 shot on the Minolta CLE with the M-Rokkor 40mm f/2. I also made a little micro-film, just snapping off some shots here and there between our setups. Really got a lot out of a shoot that was under two hours!
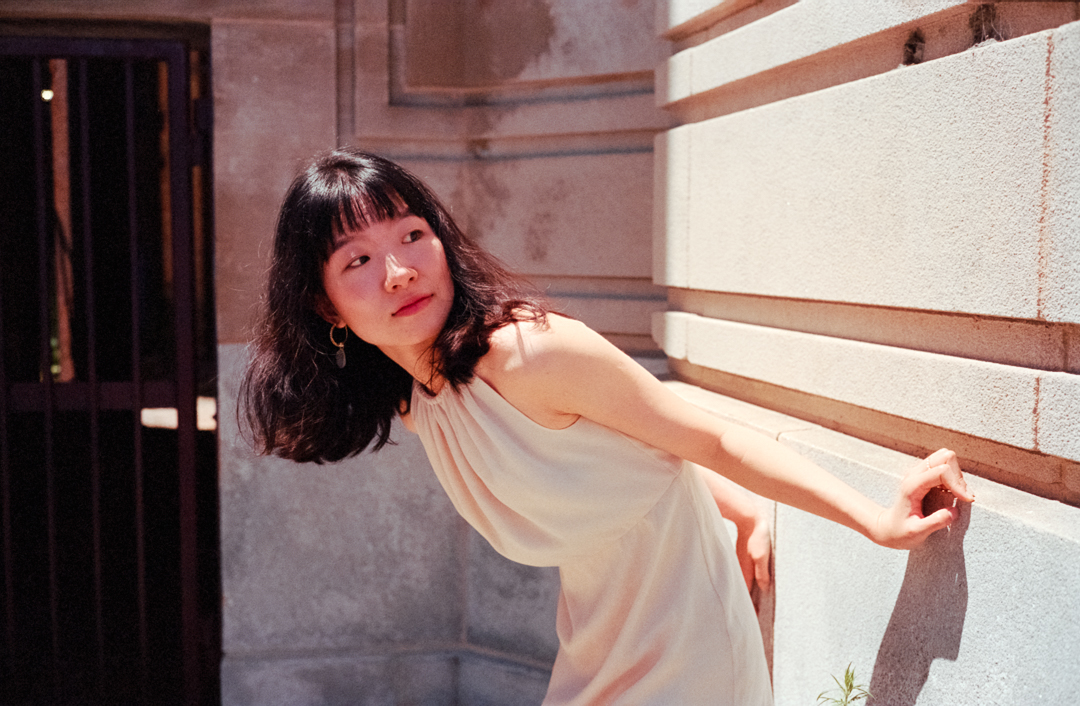
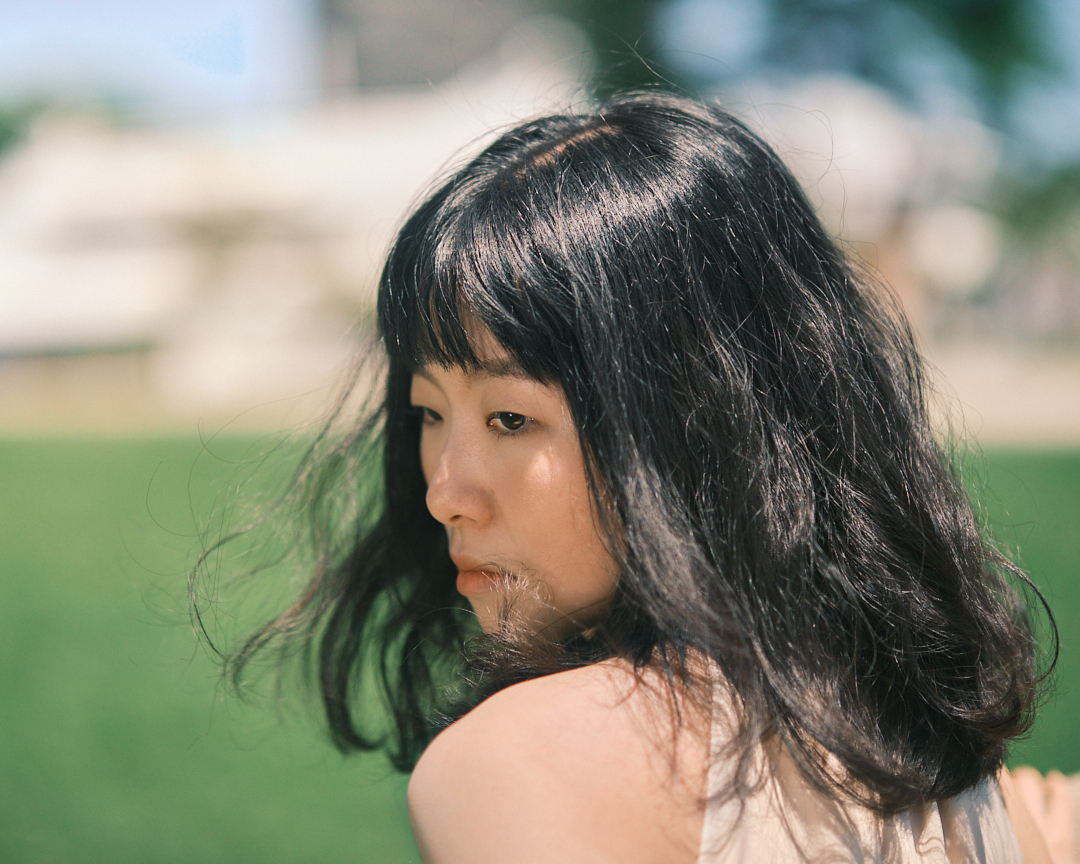
Overall, I feel like my photographic ability improved specifically because of this shoot. It wasn’t the first spec I did, but I pushed myself here to get out of my comfort zone, and I think the images speak for themselves. Sign up below for the free frequency separation action: